Introduction
This series of articles will be catered towards the beginners, so we do not wish to replicate the same amount of nuance and details that some of the professionals out there have provided. Instead, we aim to simplify the concepts and basics of the big three lifts so that it is easily digestible and executed. We hope that you can improve on the execution of your lifts in one way or another after reading our series of articles regardless of your experience level!
So, let’s talk about the Squat.
If you have been lifting for a while, you have probably been exposed to some form of squatting by now. High-bar, low-bar, front squat, goblet squat, Zercher squat, you name it. While all these variations have their differences, we believe that the basic principles of squatting remain the same – it’s all about balance, bracing, and intent. But since we are powerlifters and just a bunch of meatheads, for all intents and purposes we are only going to be talking about the back squat in this article.
the basic principles
Let’s talk about the basic principles of the squat before we begin. Lifting is all about physics (duh). We are fighting one thing, and one thing only, and that is the force of gravity. On top of all the feels that weigh us down, gravity pulls downward on our body (on our centre of gravity, to be more exact). And the reason that we are able to perform activities such as walking up or down the stairs, or bending over without high-fiving the floor with your face, is because we are able to maintain balance, and our muscles are able to function to prevent us from falling. When we are able to maintain balance, it means that we are able to keep our centre of mass (which ‘shifts’ as we move around in space or carry an object) vertically over our base of support. Of course, when we are standing upright, our base of support is our mid-foot. Intuitively, we default to the position where our centre of mass is vertically above our mid-foot because that requires the least amount of effort to maintain our balance.
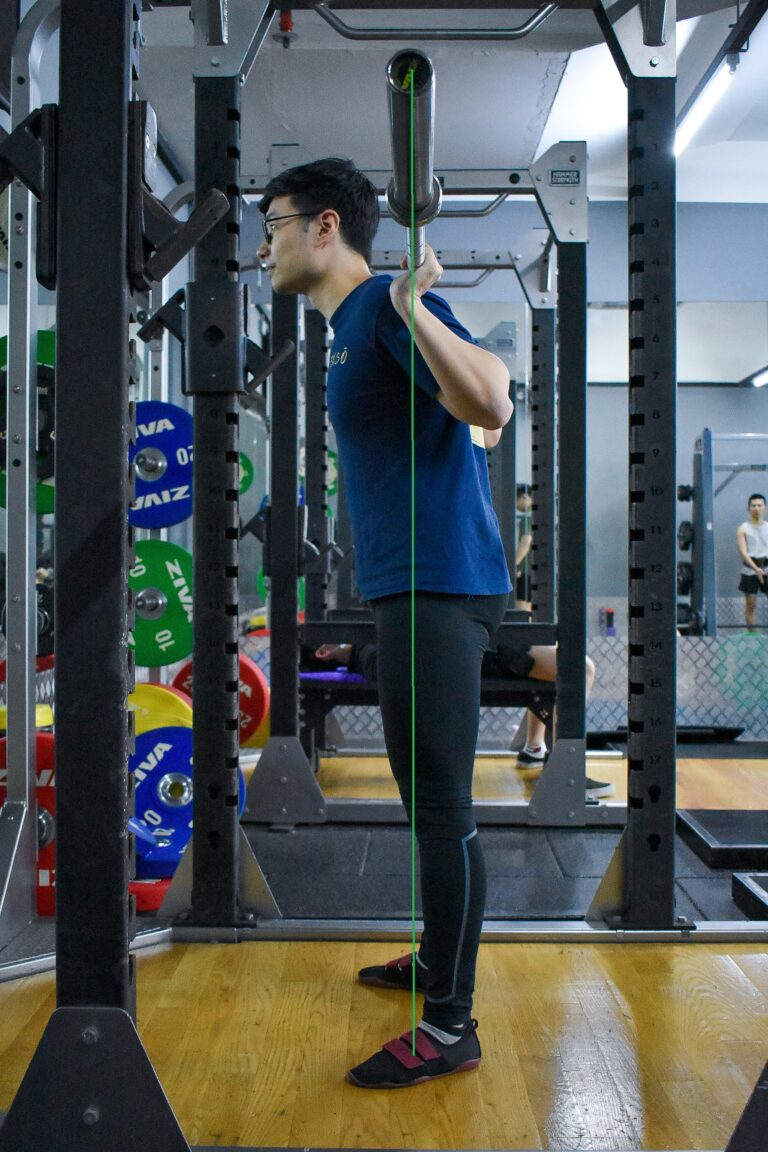
How does this apply to the squat? Now it is a little bit different because your whole system does not only consist of your body – you have a barbell on your back. To stand strong and establish a good starting position in the squat with a barbell on your back, we want the least amount of effort possible to maintain this balance, because any imbalances resulting from a deviation from the midline of our centre of gravity have to be overcome by muscular forces, which require more energy. So naturally, with a barbell on your back, your body will lean forward slightly in order to have the system’s centre of mass over your mid-foot, which translates to having the bar directly over your mid-foot.
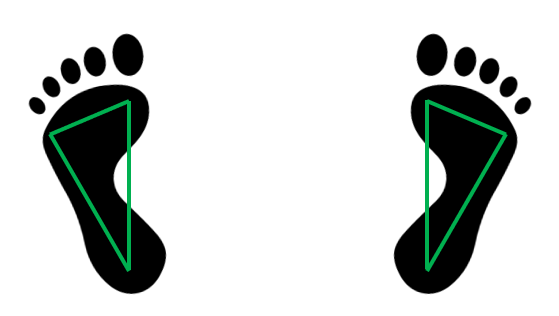
Learning to balance in the squat takes time for some people. For the most part, paying attention to the pressure on your foot will help in keeping your balance over your mid-foot. You can try to think about having a “tripod foot” by putting equal pressure on your heels, the ball of your big toe, and the base of your little toe in order to distribute the pressure equally throughout your whole foot.
But is that all there is to it? Not exactly. To make sure that the bar does not crush us as easily as our fragile ego when we see that U47 sub-junior squatting our max, we gotta brace our core. To keep things simple, to brace your core, you want to take a big breath into your belly, and push out against your abdominal walls in a 360° manner to create intra-abdominal pressure. Think about how you want to brace your core when someone is going to punch your stomach. If you do not brace your core well, you won’t be able to establish an optimal starting position, or get a good transfer of force to squat the barbell up.
the set-up
Now that we got the basic principles out of the way, we begin with the set-up. The key to having a successful lift starts from the set-up. The set-up is arguably the most important thing in completing the lift. If you want to finish strong, you have to start strong. The set-up is a “ritual” to get yourself into a consistent starting position, and a good set-up is one that is repeatable, efficient and executed with intent. Each step of your set-up should be purposeful and should help you put the lift into your focus. So let’s walk through the check-points of a good set-up.
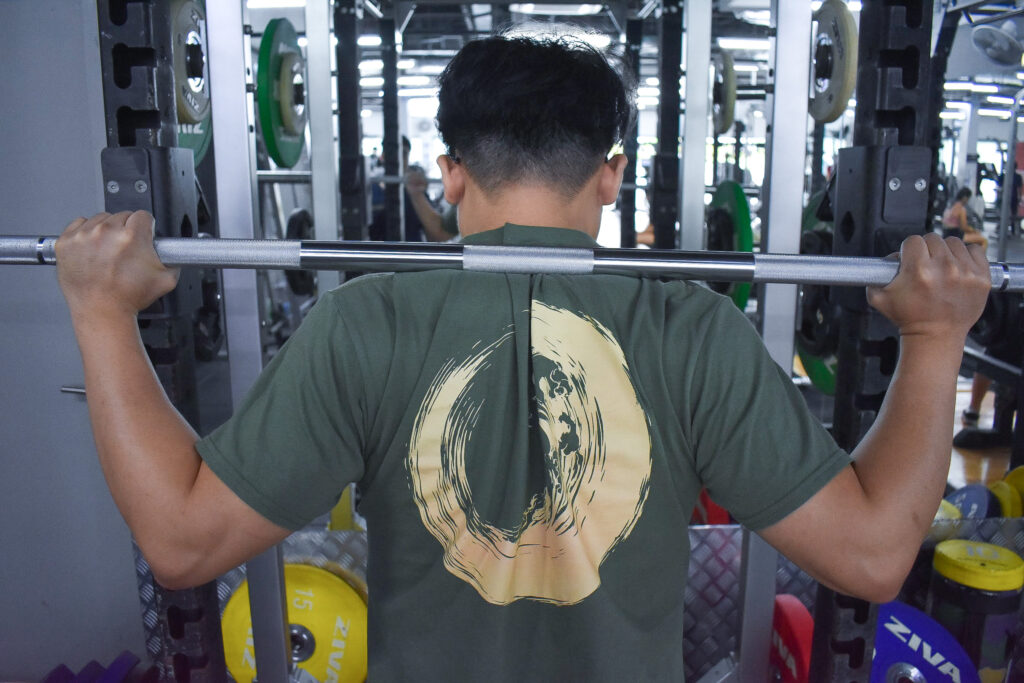
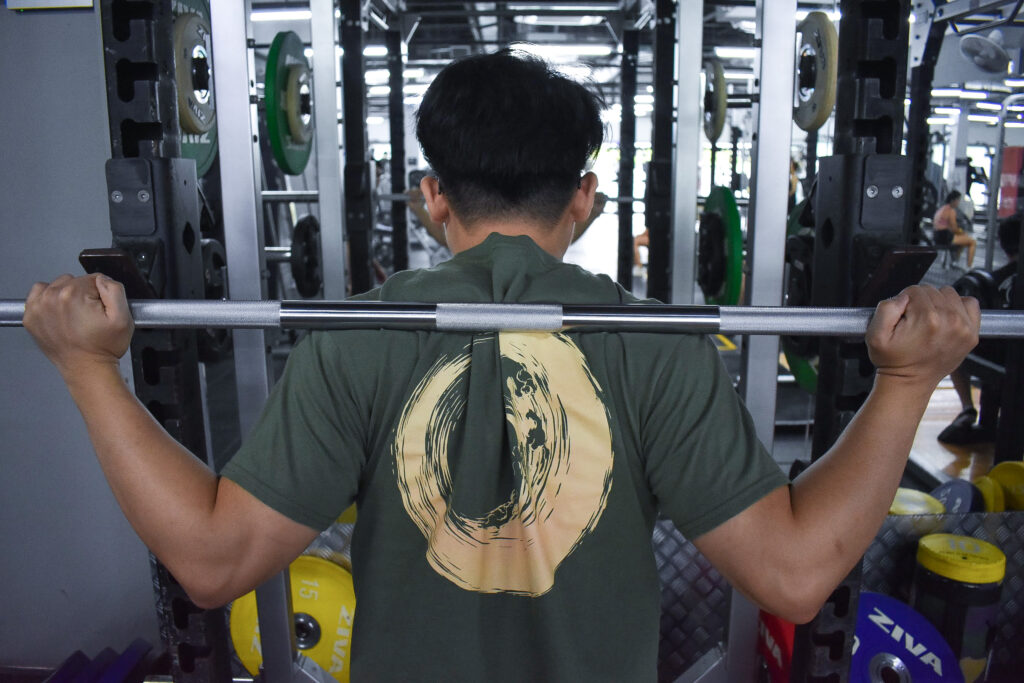
First things first, you want to establish a firm, symmetrical grip on the bar (it might be impossible to get it perfectly symmetrical all the time, but you should set-up with the intent to achieve so). Grip width will differ from person to person, but usually taking a grip width similar to how you grip on the lat pulldown exercise is a good starting point for you to slowly adjust from over time. Remember this grip width by using the markings and knurlings on the barbell as your landmarks.
You can grip the bar in 2 ways: either a full-grip, or thumbless grip. This depends from person to person on what they feel comfortable with. Either way you should aim to keep your wrist at neutral, or at a slight extension. Flexion is not generally recommended, unless you have an injury that prevents you from having your wrist at a neutral or extension without pain.
Once you have found your sweet spot for the barbell to rest on your back, brace your core and squat it up for a strong unrack. Let the barbell settle, and you are ready to walk it out and set your stance.
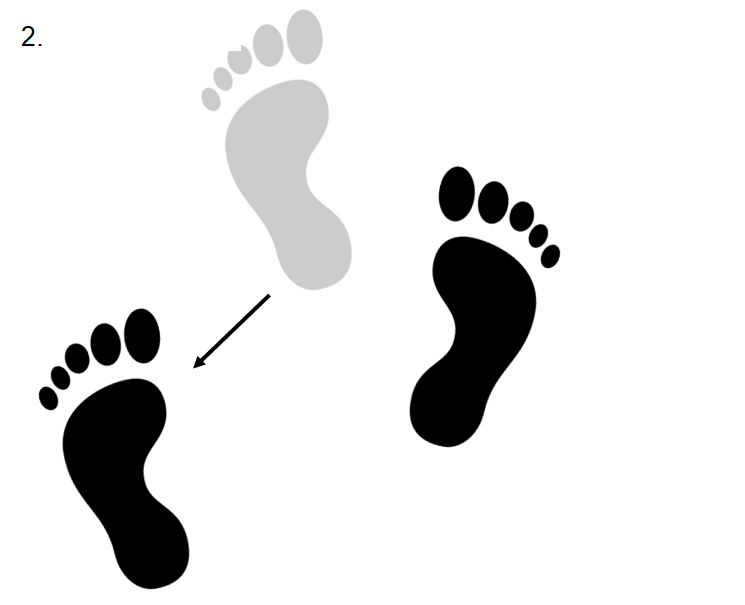
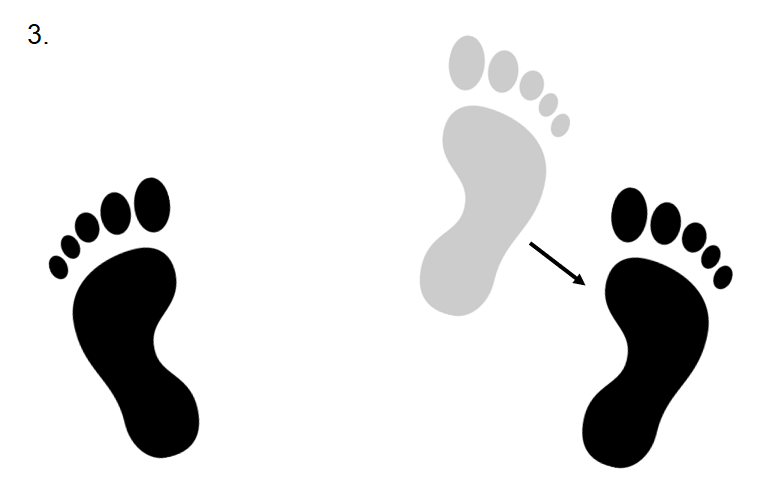
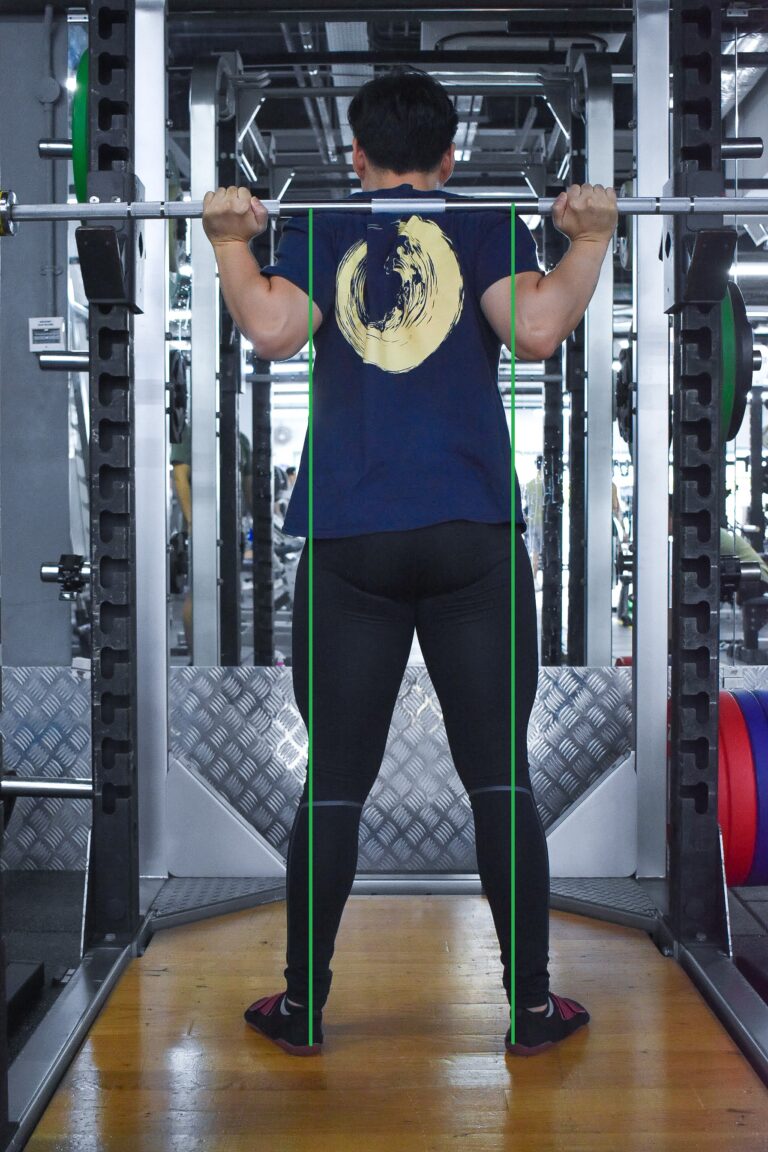
A good walk-out should set your stance with the least amount of effort, and as consistently as possible. You would want to walk out far enough such that you don’t run into the J-hooks of the rack, but not too far because you will waste more energy than you need to. To achieve this, we prefer to teach the 3-step walk-out. We find that it is repeatable and consistent because your balance shifts a small amount at a time, making it easy to control as you get into your starting position with a heavy weight on your back.
3-step walk-out:
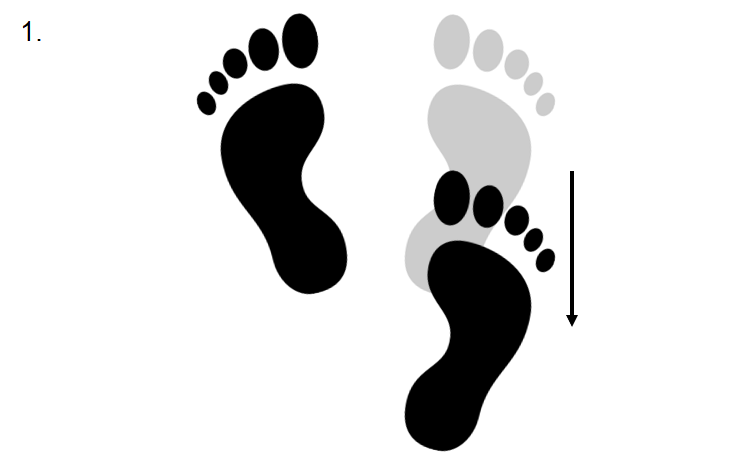
1. Take a half-step with your left/right leg, to clear the barbell out of the J-hooks.
2. Take a step with your other leg, establishing your squat stance with that foot.
3. Complete the walk-out by taking another half-step to match the squat stance with your other leg.
But what stance should you take in the squat? Just like the grip width, your squat stance will differ from person to person. If you have not previously set your squatting stance, taking a stance somewhere between hip-width and shoulder-width stance with your toes slightly pointed out will be a good starting point to adjust from over time. Eventually, you would want to find a stance that allows you to maintain balance throughout the whole range of motion of the squat, hit depth with ease, and exert force on the ground hard with your whole feet in contact with the ground throughout.
the Execution
Once we get into a solid starting position, we are ready to execute the squat. If you have successfully executed the set-up well, the execution becomes simple and clean. Brace your core, and initiate the squat by hinging at the hips and breaking at the knees at the same time, while keeping the bar over your mid-foot. Sit straight down into a low chair to achieve proper depth. After that, simply stand back up by driving your legs hard towards the ground while keeping your torso rigid. Lock out by standing strong (just like in a starting position), and you are ready to perform another repetition.
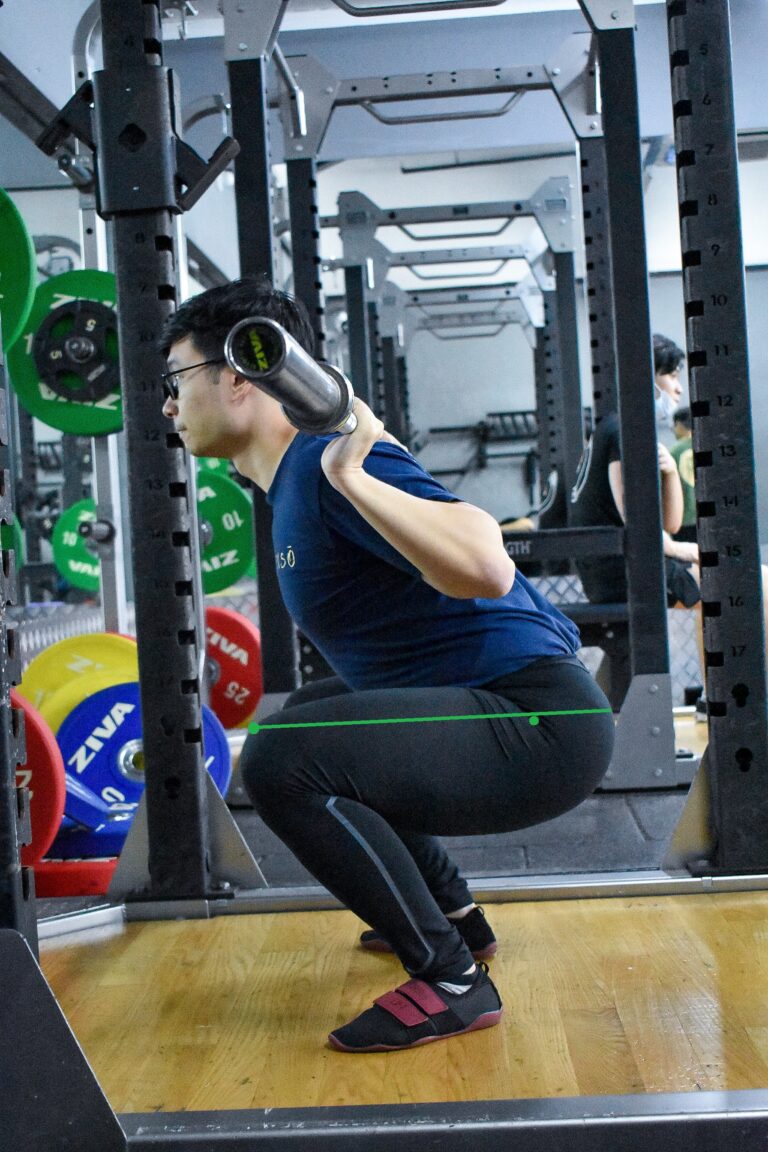
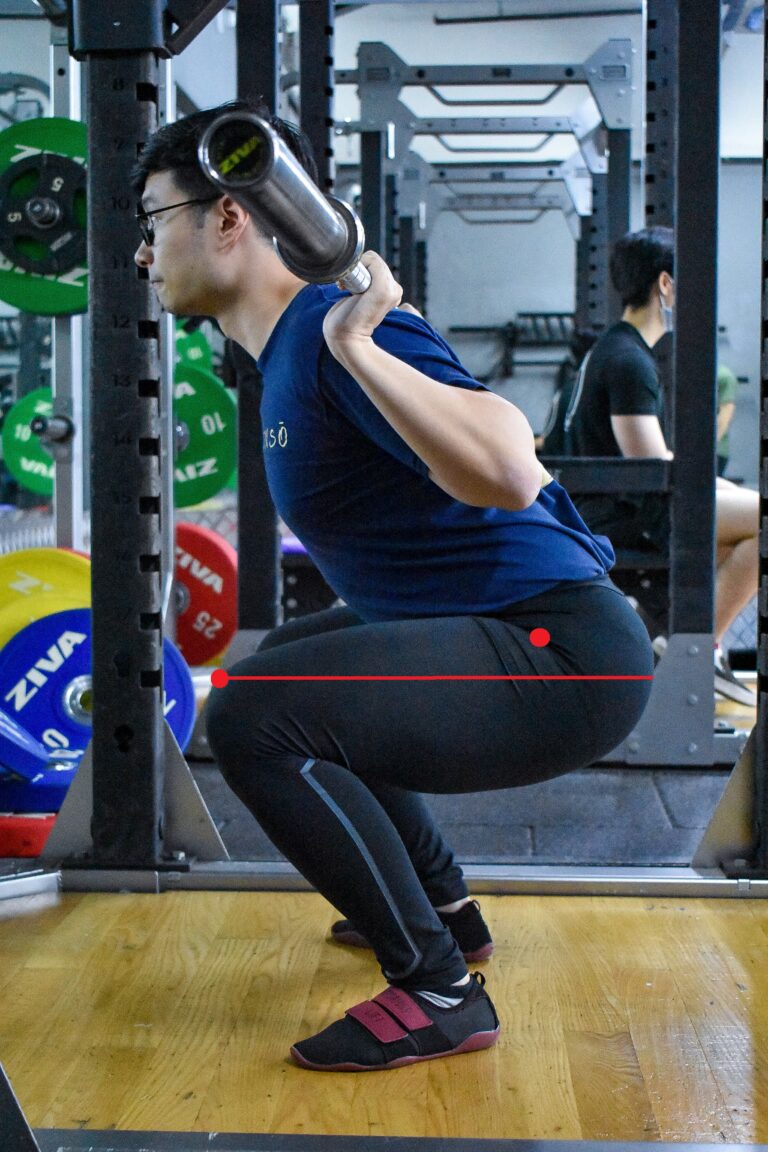
Pretty simple ain’t it? Because it should be. It takes a lot of practice to achieve consistency in your set-up and execution. But the important thing is to stay patient and keep doing them with intent. A good, replicable technique won’t magically manifest itself. Build the good habits rep by rep and do not rush your progression. We are all here for the long game.
Further questions? Feel free to contact us at enso.powerlifting@gmail.com.
