introduction
This series of articles will be catered more towards the beginners, so we do not wish to replicate the same amount of nuance and details that some of the professionals out there have provided. Instead, we aim to simplify the concepts and basics of the big three lifts such that it is easily digestible and executed. We hope that you can improve on the execution of your lifts, one way or another after reading our series of articles regardless of your experience level!
Now we are on to the last lift of the big 3. The Deadlift.
conclusion
In the deadlift, we grab the bar and stand up.
Further questions? Feel free to contact us at enso.powerlifting@gmail.com.
Just kidding. Maybe.
introduction
Okay now for real. The lift all the long arms boys love. The Deadlift. Some say the lower back breaking movement. But that’s pretty much any movement that involves hip hinging when it is not done properly. Truthfully, the deadlift is probably the most intuitive lift for most people. Well, at least it’s pretty much the simplest. We were not exactly kidding when we said simply grab the bar and stand up. It’s actually just as simple as that. But simple in theory does not mean simple in execution. So let’s dive into the deadlift a little bit more and see if we can break down this “grab the bar and stand up” movement, for both the conventional and sumo stance.
the basic principle
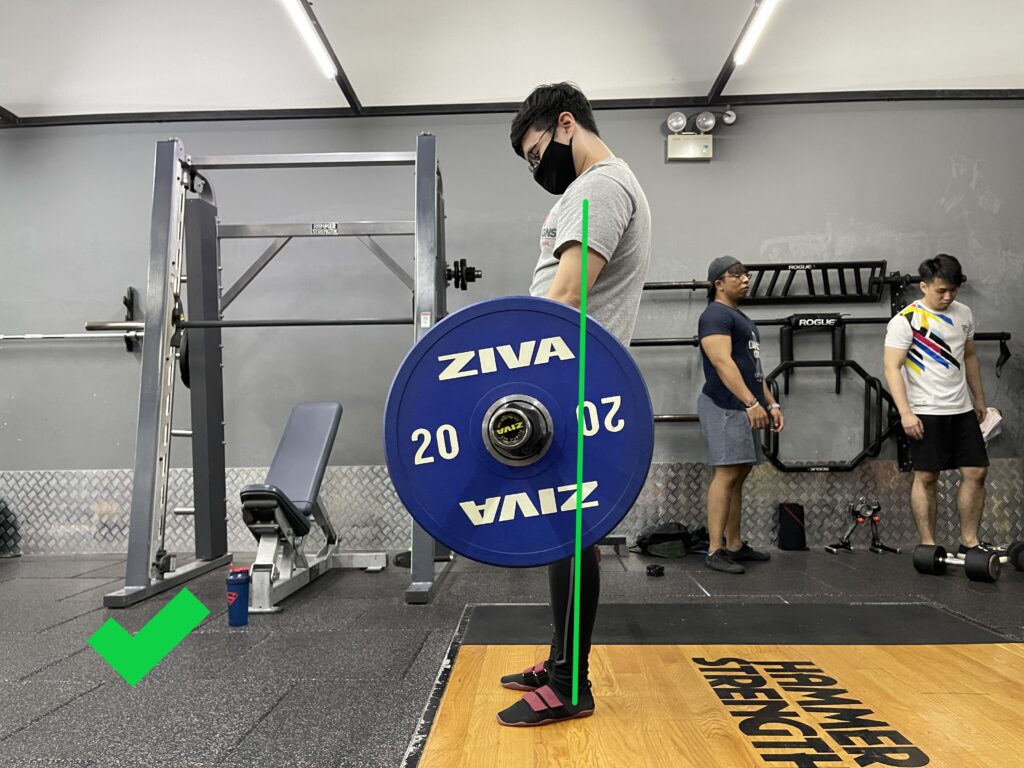
Before that, it’s physics time ladies and gents. If you have read our squat and bench press article, you know that we are going to dive back into balance. We want to keep our centre of mass over our base of support, which is our midfoot. So to make sure that we do not have any imbalances forward and backward that have to be overcome by muscular forces, the barbell eventually has to be over our midfoot. And of course, if we want our base of support to be strong, establishing a solid footing is important. You can try to think about having a “tripod foot” by putting equal pressure on your heels, the ball of your big toe, and the base of your little toe in order to distribute the pressure equally throughout your whole foot. Sounds familiar? If it does not, head over to our beginner squat article and give that a read 😉
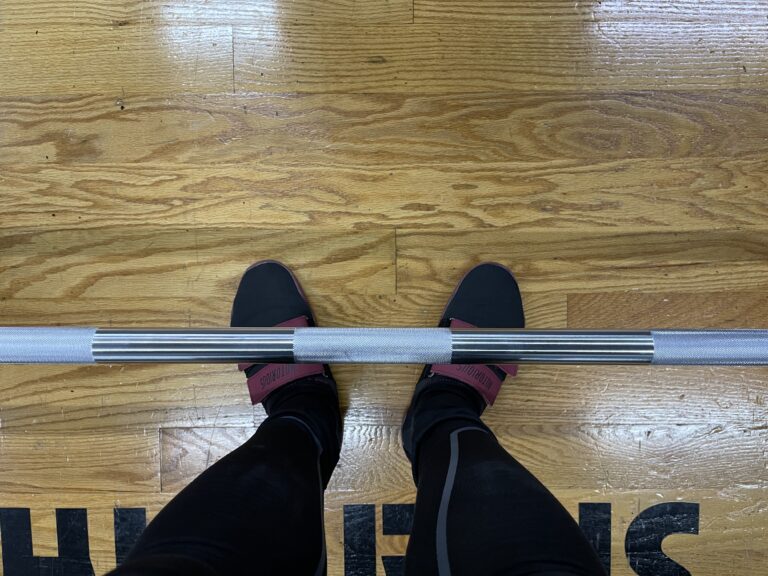
Barbell over midfoot for the conventional stance.
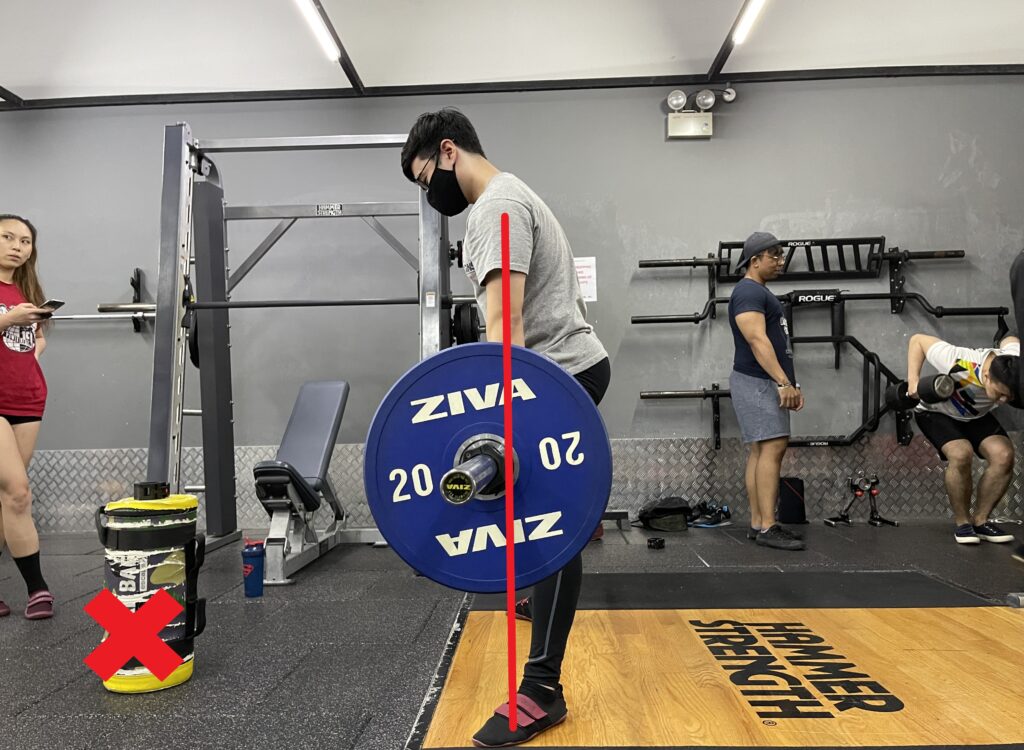
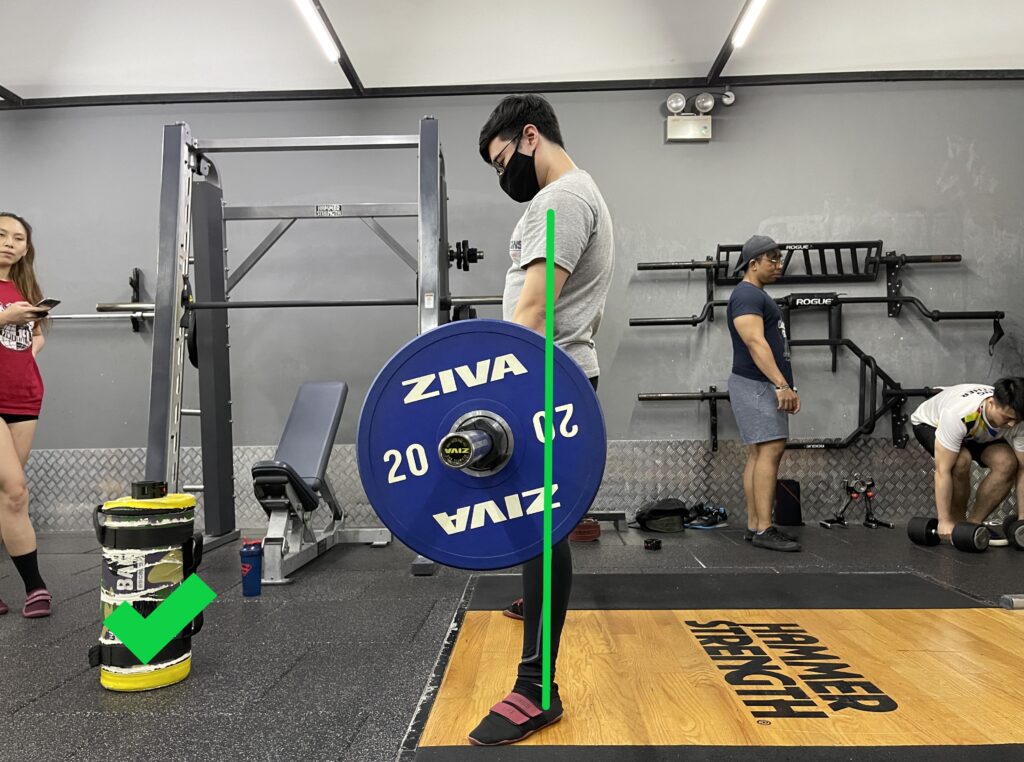
So how does this apply to the deadlift? Unlike the squat where the barbell is placed on our back, in the deadlift, the barbell is in front of us. This means a couple of things. Your shoulders have to be out in front of you, and there is a limit to how much your knees can travel forward before you start pushing the barbell away from your midfoot with your shins. In order to stay balanced on your midfoot and prevent the barbell from shifting your whole balance forward through the whole movement, you must have your shoulders over the barbell. In other words, your armpits must be directly on top of the barbell. With your shoulders over the barbell and the barbell over your midfoot, your hips will naturally gravitate to where it is supposed to be given your own body proportions. How your starting position looks like in the deadlift (how upright you are, how far your hips are in relation to the bar, etc) will be largely determined by your own morphology such as your femur, torso, and arm length.
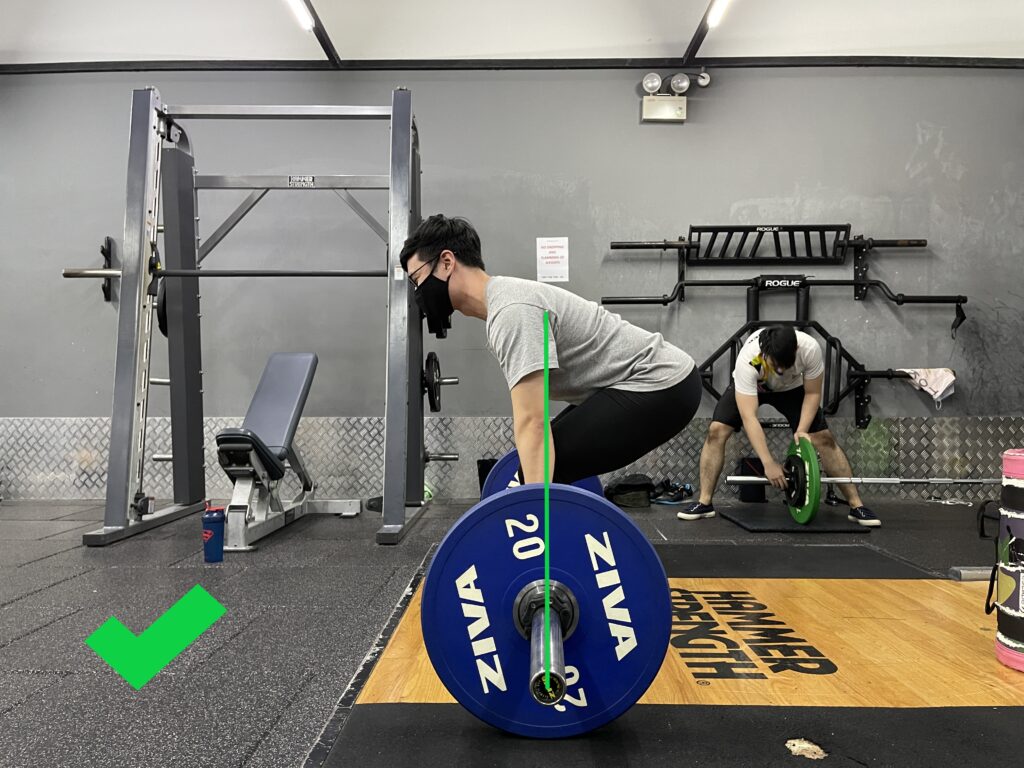
Proper starting position, with the shoulders over the barbell.
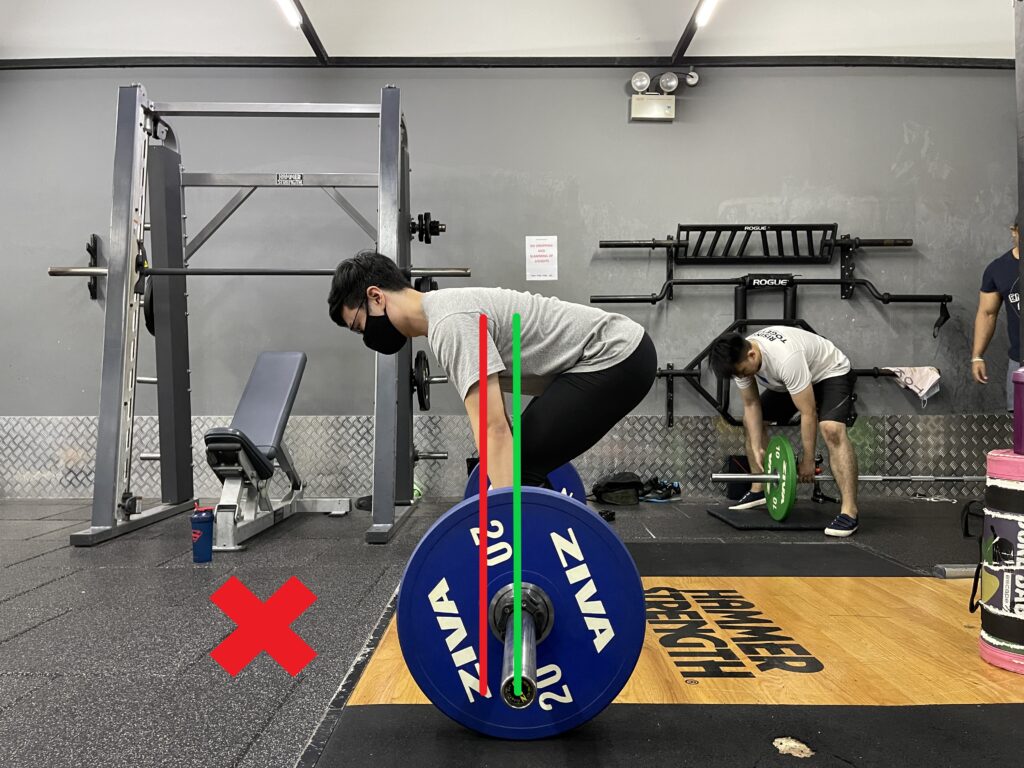
Improper starting position, with the shoulders too far forward from the barbell.
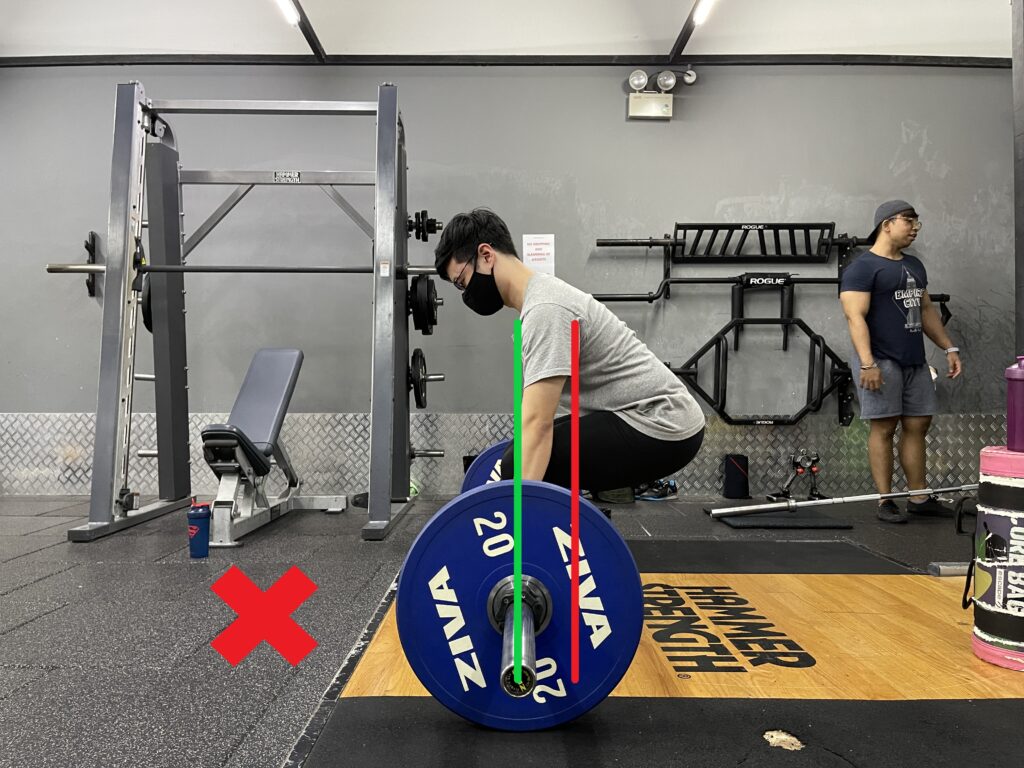
Improper starting position, with the shoulders too far behind the barbell.
Just like in the squat, we want our core braced and torso rigid to make sure that our spine does not shoot out of our ass when we are executing the deadlift. To brace your core, you want to take a big breath into your belly, and push out against your abdominal walls in a 360⁰ manner to create intra-abdominal pressure. A braced and rigid torso will also allow you to get a good transfer of force to get the barbell off the floor. You can think of your body as a pulley in this movement. If you don’t get the rope taut, the transfer of force will not be as optimal. Thus, it is important that you brace hard, keep the torso rigid and pull the slack out of the barbell before you initiate the movement.
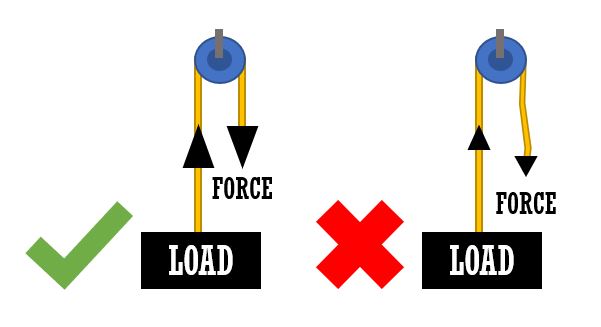
Left: Taut rope, optimal force transfer.
Right: Slack rope, non-optimal force transfer.
the set-up
With that out of the way, let’s go onto the set-up. We are going to keep repeating this point because it is VERY IMPORTANT. A set-up that is repeatable, efficient, and executed with intent will get you into a good and consistent starting position. This helps you to execute each set and each rep as consistently as possible. Of course, like everything else, it will take time and practice. Be purposeful with each step you take in your set-up and execute your lifts with intent.
Let’s walk through the check-points of a good set-up in the deadlift.
First things first, approach the barbell and centre yourself with the barbell over your midfoot. Stance width wise, it will differ from person to person. If you have not found a stance that you are comfortable with, take a stance with your feet right underneath your hips, with your toes slightly pointed out for conventional. For sumo, take a stance where your shins will be perpendicular to the floor at your starting position. You can slowly adjust this stance over time as you continue training and slowly find a stance where you feel the strongest. You can easily remember this starting position by using your shoelace and the markings on the barbell as landmarks as well.
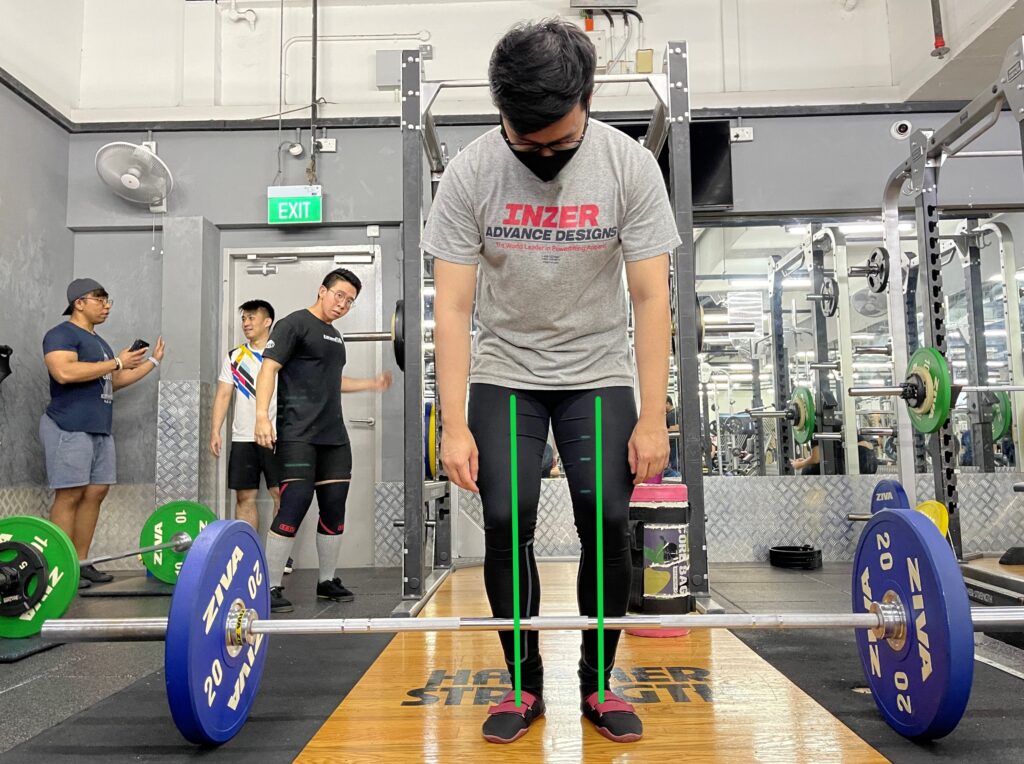
Stance width, conventional deadlift.
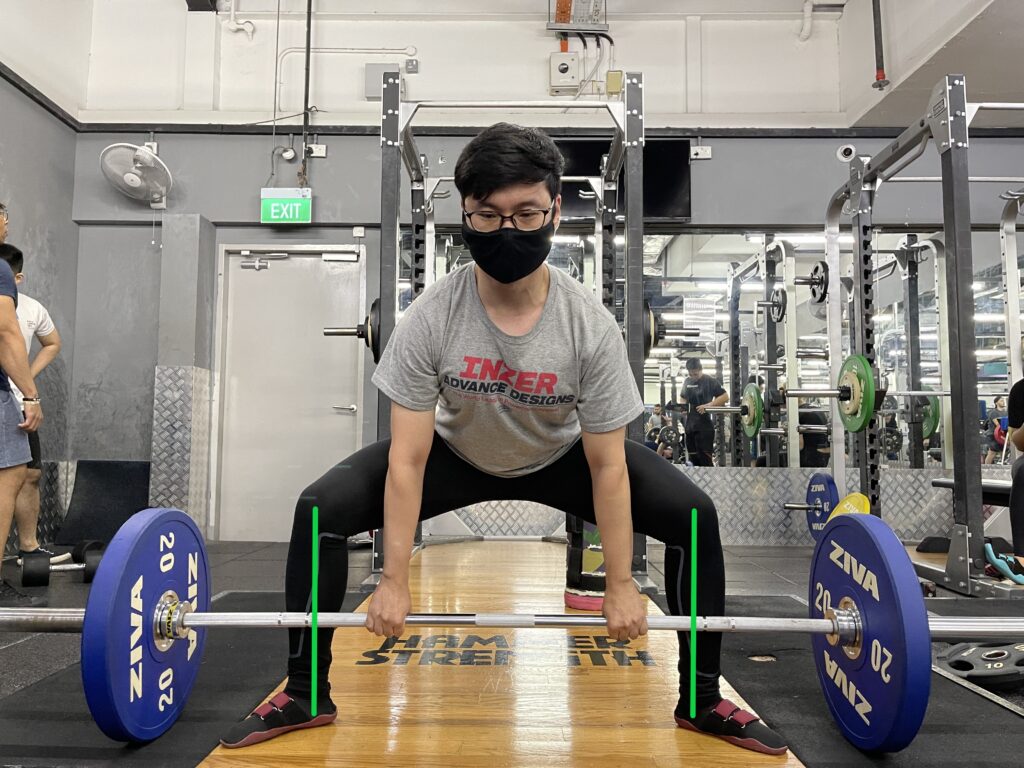
Stance width, sumo deadlift.
“Lengthen” your arms by pushing your shoulders down (opposite of retraction). Bend at your hips, bring your shins to the bar and grab the barbell, having your shoulders over it. Likewise, the grip width will differ from person to person. Usually, where you grip will end up being where you let your arms hang down naturally. However, for conventional, your grip should be outside your shins and it should not force your knees inwards when you fully straighten your elbows. As for sumo, your grip should be inside your shins, and your hands and forearms should not get in the way of your shins.
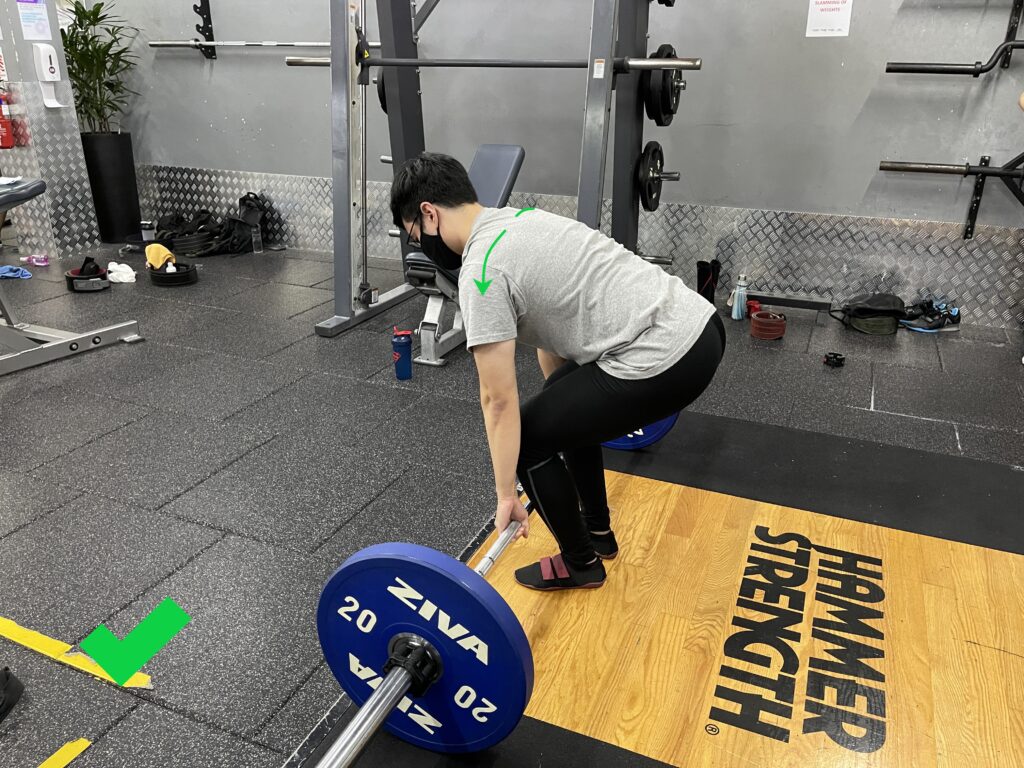
“Long arms”, shoulders protracted.
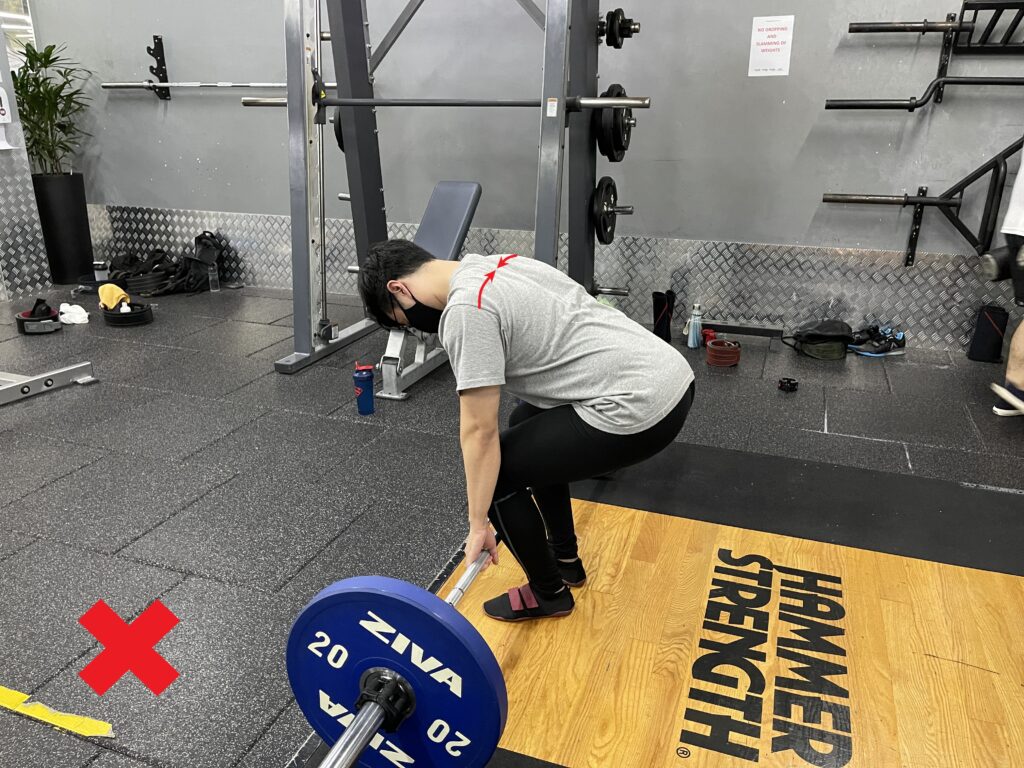
“Short arms”, shoulders retracted.
the execution
You want to pull the slack out of the barbell by applying tension on the barbell, straightening your lower back and bringing your upper chest up through your shoulders, and brace hard by taking a big breath into your belly.
Last but not least, initiate the movement by pushing the floor away from you, and stand up strong by locking out your knees, squeezing your glutes and having your shoulders in-line with your body. Control the weight back down to the floor, reset, and you are ready to perform another rep.
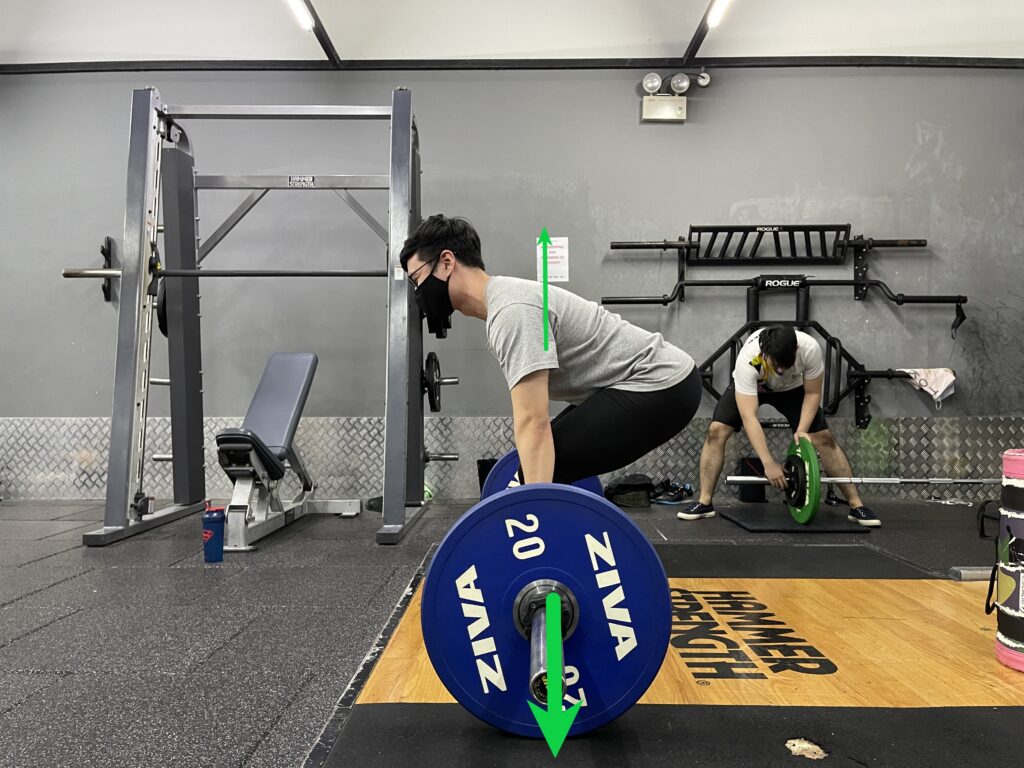
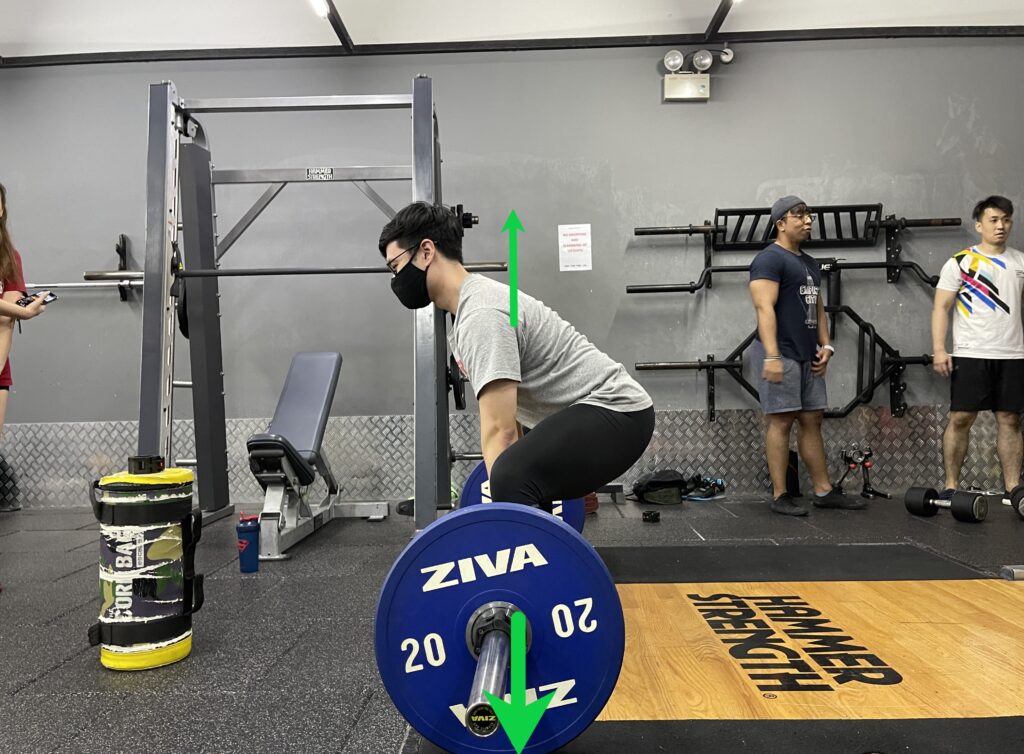
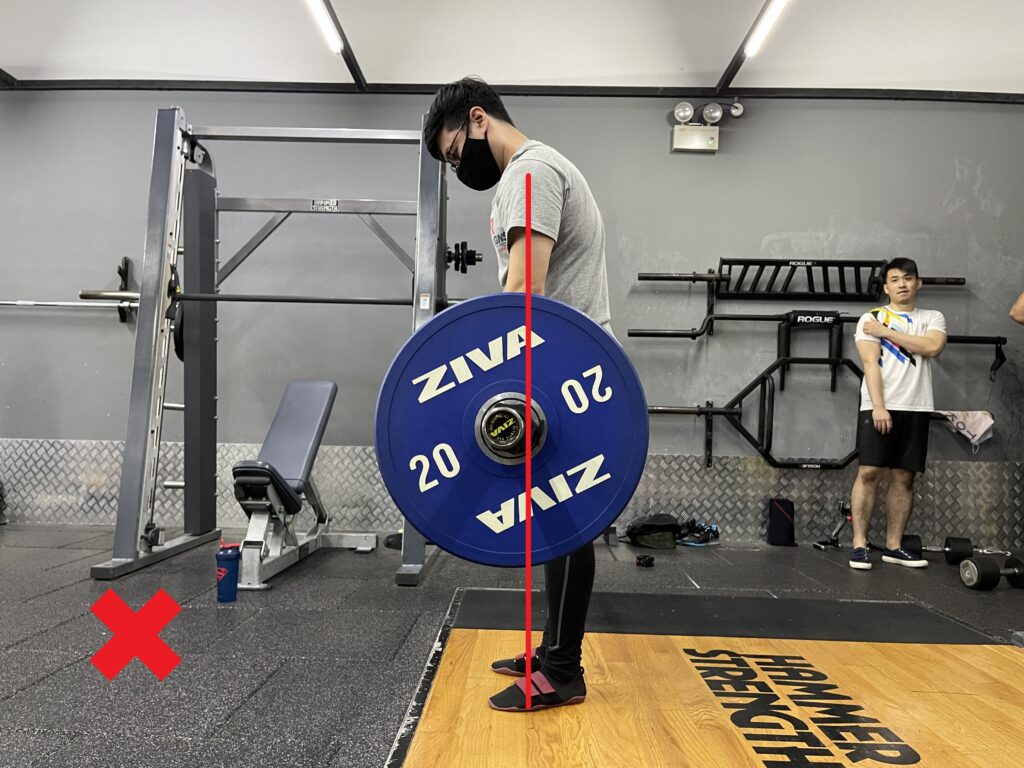
Conventional deadlift. Top to bottom: Initiation to completion.
Sumo deadlift. Top to bottom: Initiation to completion.
And that’s it. As usual, we would like to convey the message that the lifts are simple, and should be kept that way. Overcomplicating the lifts simply overloads your mind, and will eventually interfere with your force production. Keep practicing to achieve consistency in your set-up and execution, and build good habits rep by rep.
Further questions? Feel free to contact us at enso.powerlifting@gmail.com.
